
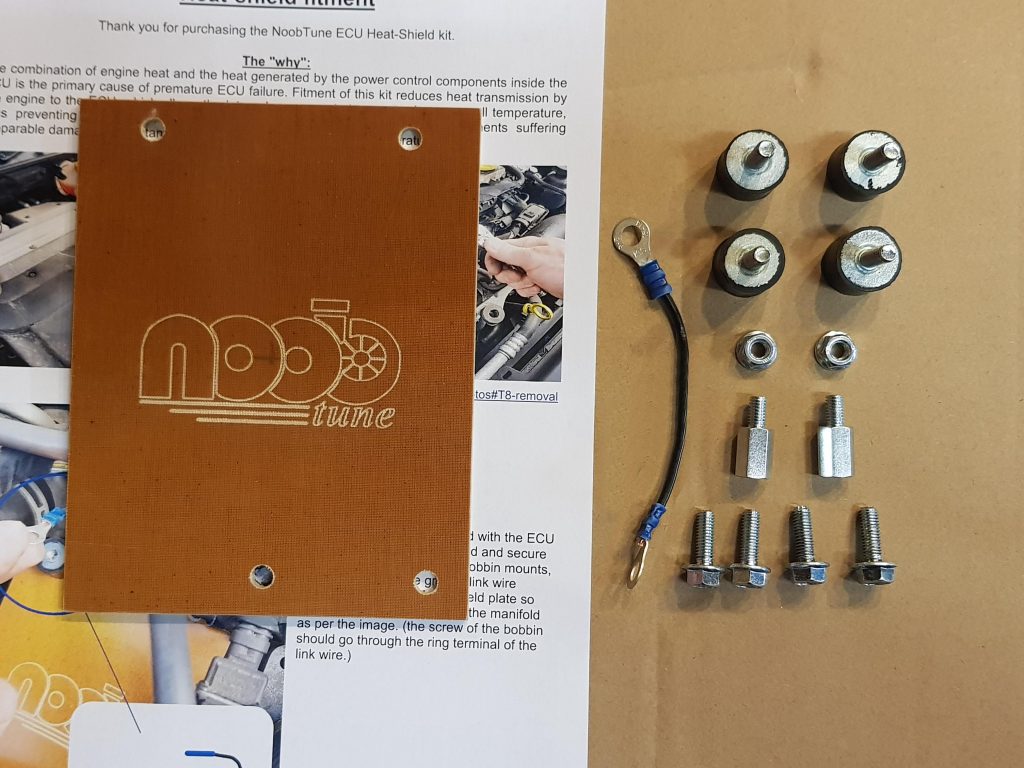
The “why”:
The combination of engine heat and the heat generated by the power control components inside the T8 ECU is the primary cause of ECU failure. Fitment of this kit reduces heat transmission by the engine to the ECU, which allows the internal components to run at a lower overall temperature, thus preventing (or at least significantly reducing) the chance of those components suffering irreparable damage by constantly operating outside their intended temperature range.
To order a NoobTune heatshield kit please email saabnoobtune@gmail.com. The kits are £50 plus postage, with free fitting if you’re bringing the car to have a remap done.
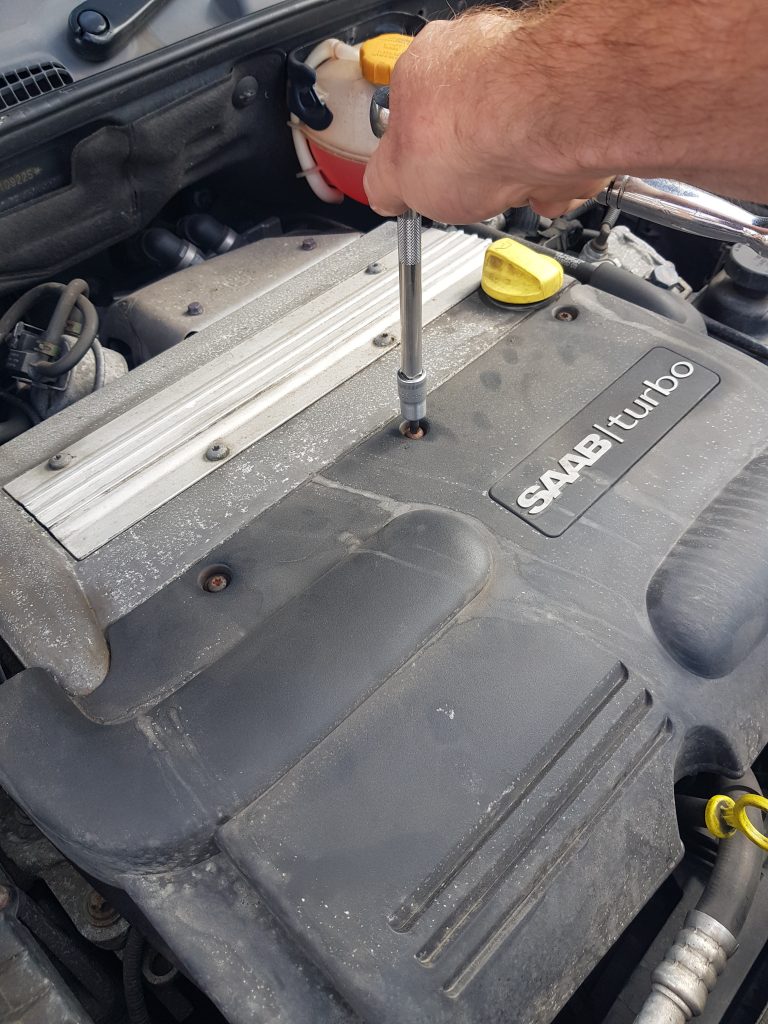
Step 1.
Remove the plastic cover over the front of the engine. This is (usually) held in with 3x Torx30 bolts.
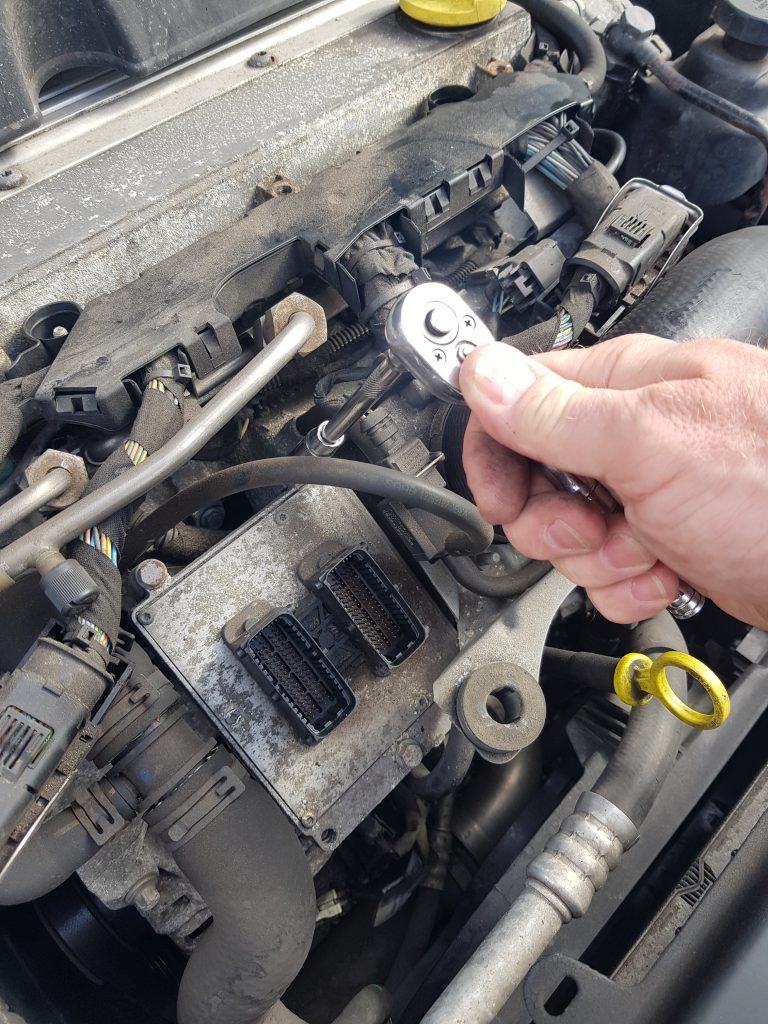
Step 2.
Remove the ECU (4x 10mm bolts), noting the earth wire terminal attached to the top right-hand bolt. A video of how to [safely] remove the connectors is available on the how-to page at https://noobtune.co.uk/information-and-how-tos#T8-removal

Step 3.
Line up the new heatshield with the ECU mounting holes in the manifold and secure it with the four rubber bobbin mounts supplied in the kit.
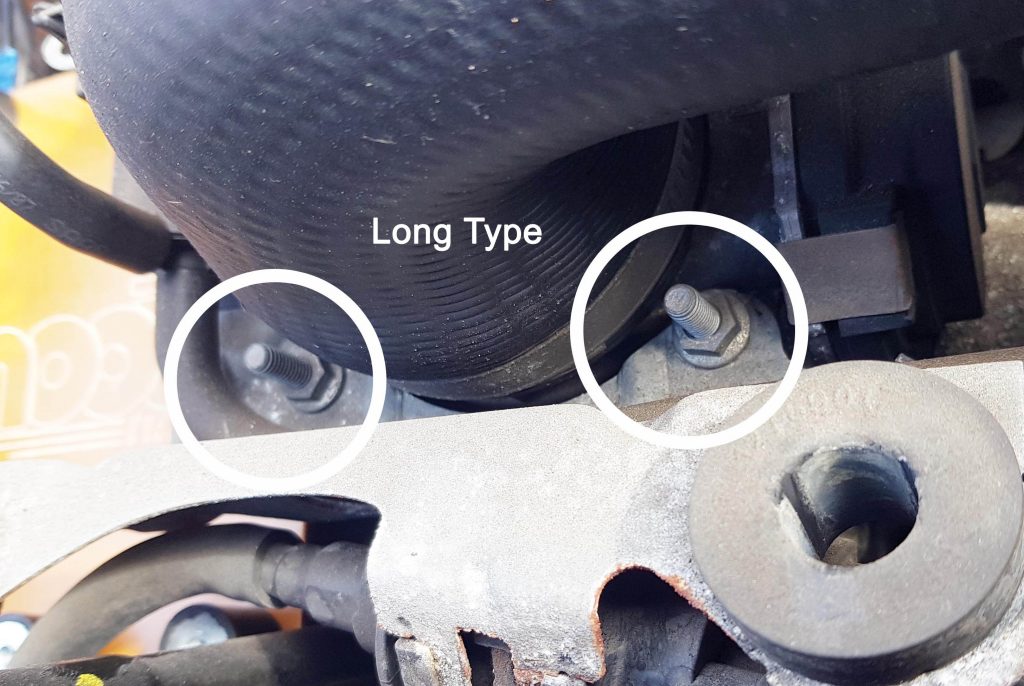
Step 4.
Remove the two nuts holding the mounting bracket for the plastic engine cover and move it off the threaded posts.

If your threaded posts are the longer type like those shown in the image (usually 2007 onwards models), then install the two 10mm nuts from the kit about 4-5mm onto the threaded posts and then replace the mounting bracket and re-fit the original nuts on top.
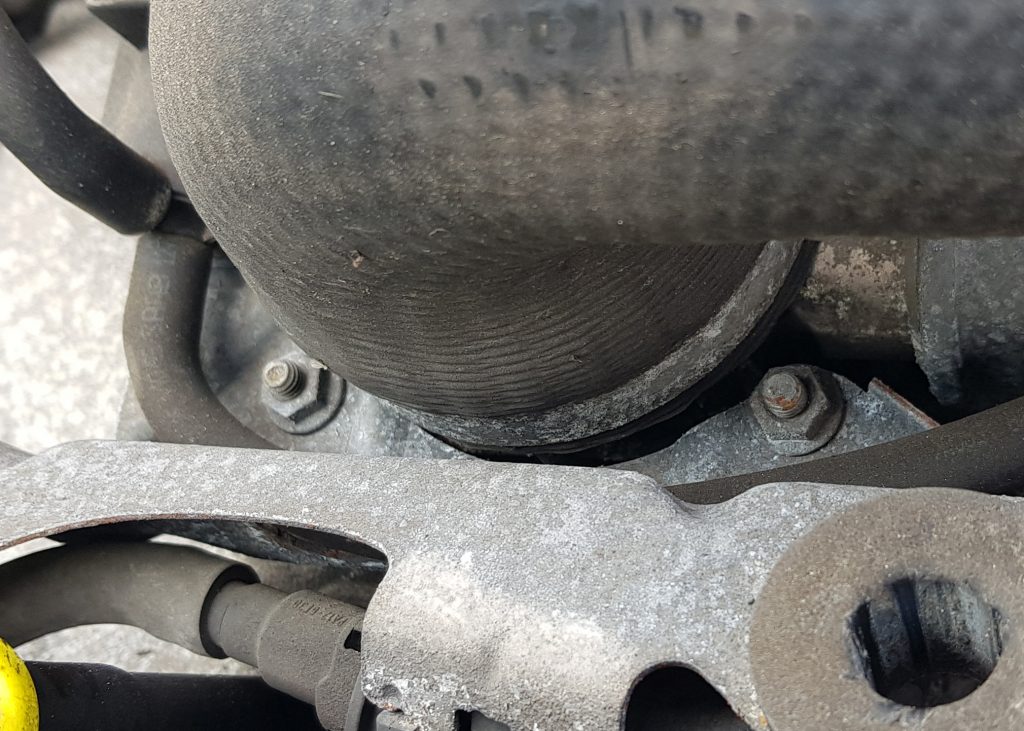
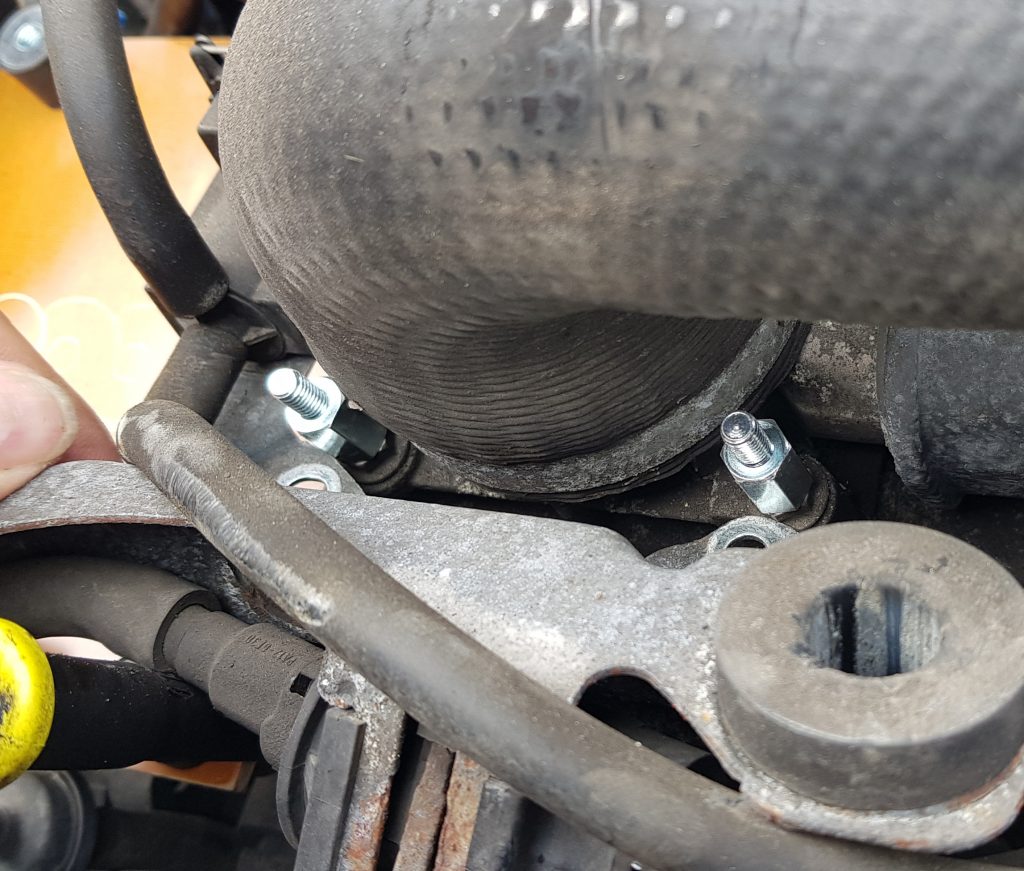
If your threaded posts are the shorter type (as across) then remove the two 10 mm nuts and bracket and install the spacer posts from the kit (as in the image below) and then place the mounting bracket on top and use either the original nuts or the ones from the kit to tighten it down.
This is done to raise the mounting bracket and plastic cover to allow more air flow under it, and to avoid it fouling the now raised up ECU.
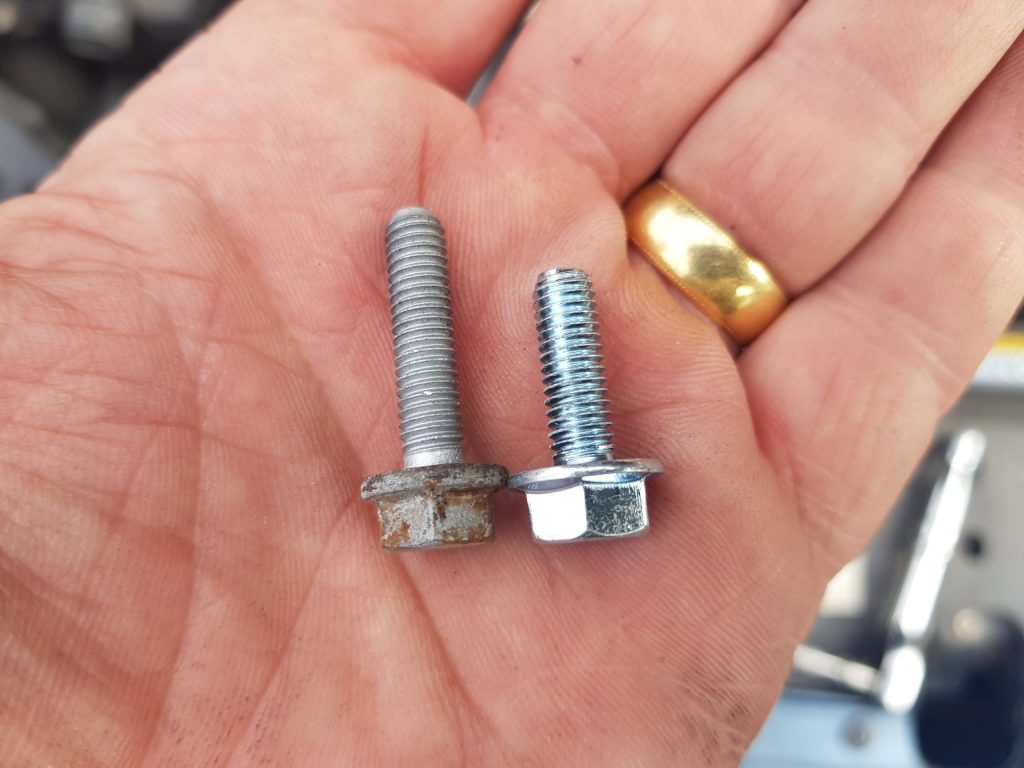
The shorter bolts from the kit must be used to ensure tight fitment of the ECU and ground wires.
Step 5.
Re-fit the ECU on top of the newly-installed rubber bobbins using the slightly shorter 10mm bolts from the kit (the original bolts aren’t re-used).
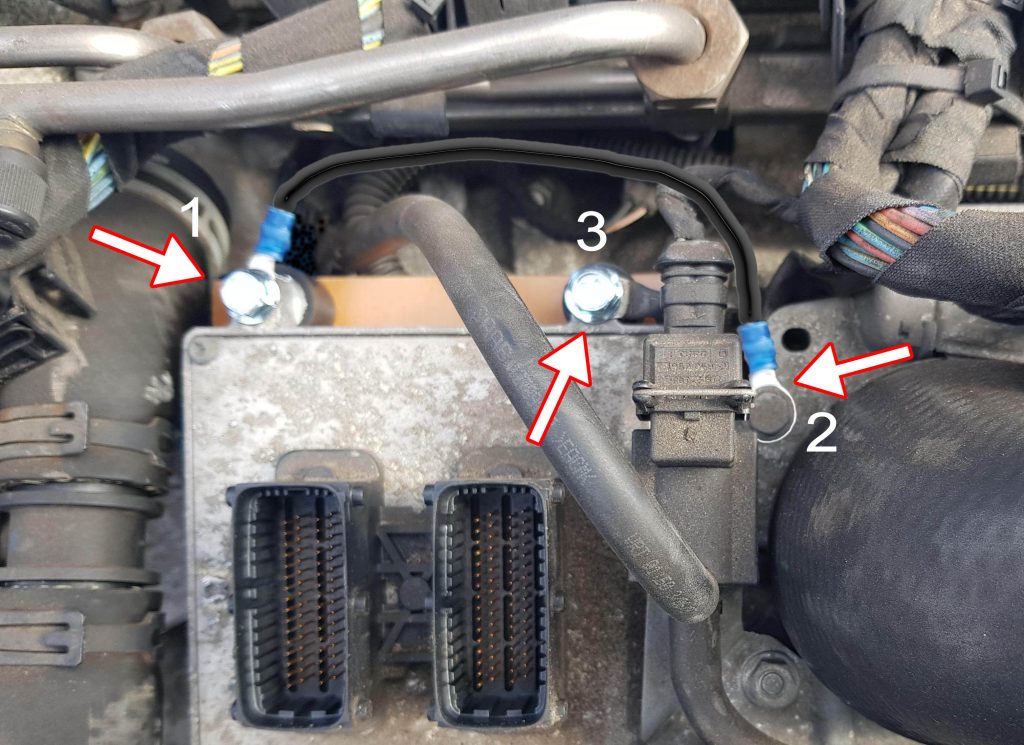
Bolt the new ground link wire to the top left-hand bolt of the ECU (1) and the other end to the top left hand bolt of the throttle body (2).
Bolt the car’s original ground wire to the top right-hand ECU bolt where it was located originally (3).
The car’s ground wire is the main earth for the ECU and must contact the ECU directly. The extra link wire is simply to provide a ground for the manifold and throttle body.
Refit the connectors and plastic cover and job done!