
On this page:
T8/Trionic 8 Removal 9-3 03-11my
T7/Trionic 7 Removal 9-5 98-10my
T7 and T5 removal OG9-3 98-02my
T8 ECU Heat-shield fitment
T8 ECU removal
9-3 from 2003 to 2011
(Z20NET is similar but with plastic levers and one connector inverted)
Firstly, park the car so you can get in and out of the passenger door. Undo the bonnet and disconnect the battery making sure you don’t have your keys in or near the ignition when you do it.
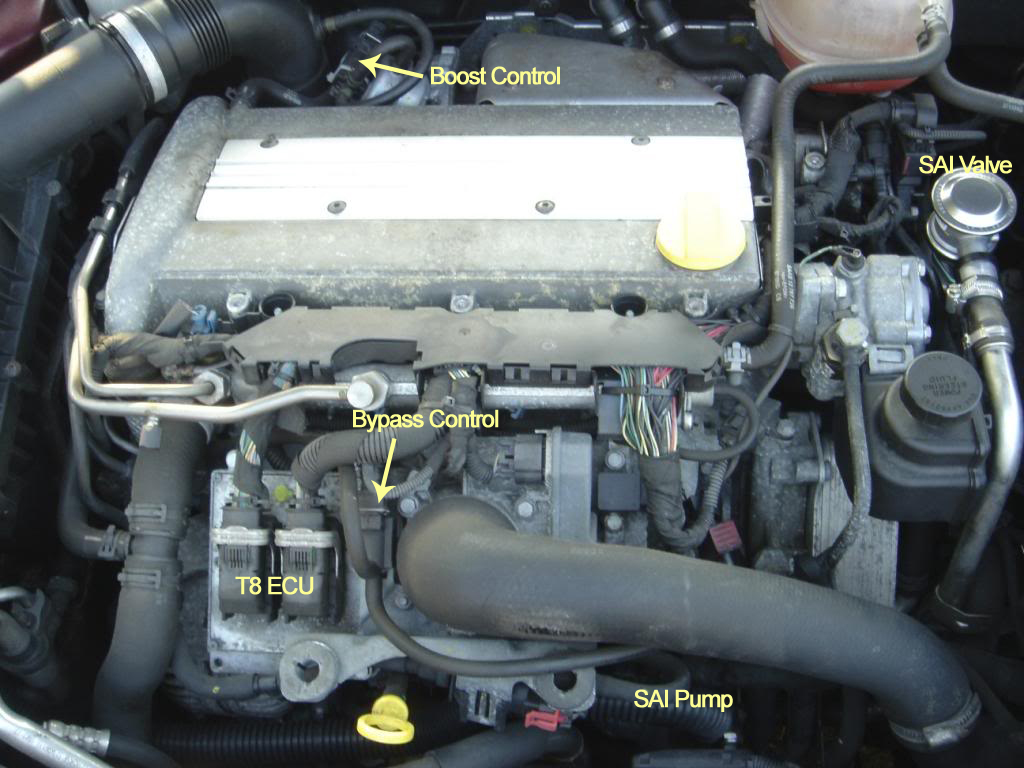
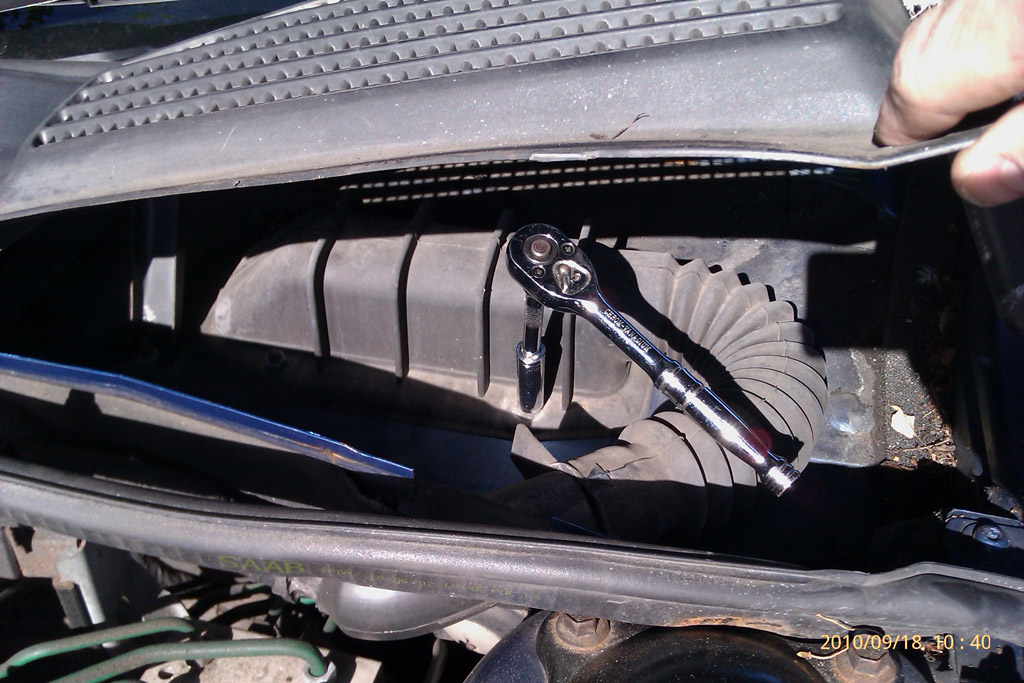
The ECU is under the plastic cover on the front of the engine. 3x Torx30 bolts to remove that. (The picture above shows that cover already removed)
The ECU is held in with 4x 10mm bolts and two slide-lock connectors.
Be very careful with the slide-locks and levers, they always stick but they can break if forced (see video below).
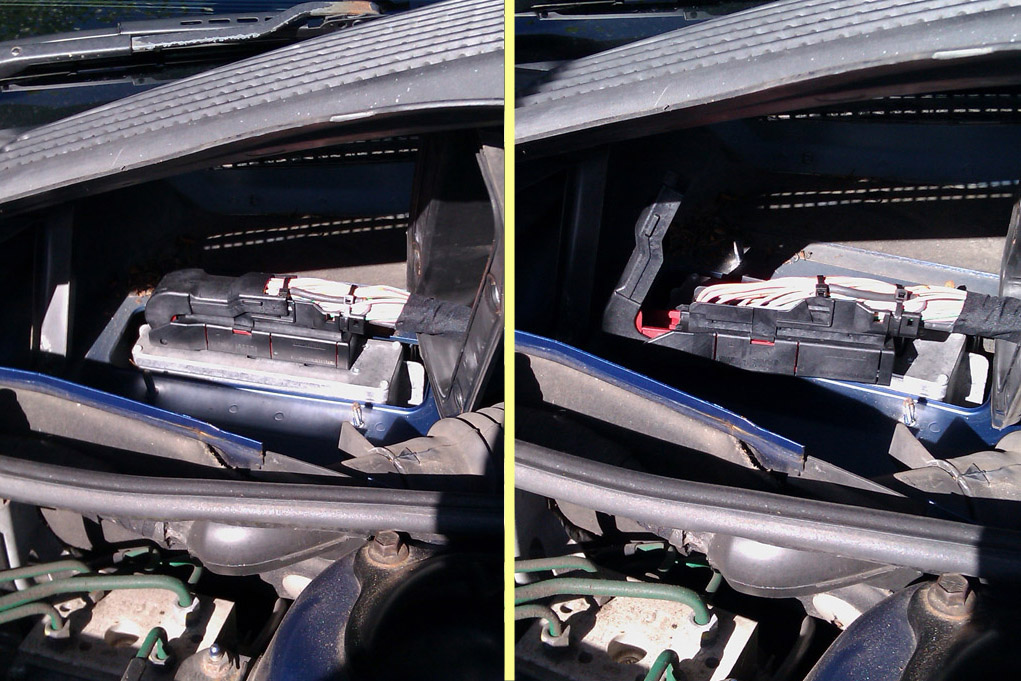
On top of each connector there’s a metal lever that operates the slide-lock and it’s prevented from moving by a small ridged button in the middle of the top face of the connector. Press on that to allow the lever to pull up slightly, but 1-2mm only. DON’T try to pull the lever any further, it’s only located on the connector by plastic rivets on each side and they break well before the slides come unstuck.
On the bottom end of the connector you’ll see the two sides of the slide-lock protruding out. Using a screwdriver or similar, push each side into the connector just enough to free it, same each side, but only about 1-2mm. The metal lever on top should then be able to take them the rest of the way. In many cases the slide-lock needs just a bit of extra manual assistance at the end of the lever’s travel to allow the connector to come completely free.
Once it’s out you can close the bonnet and then get in the passenger side and push all the other door locks down by hand from the passenger side. Exit by the passenger door and lock that with the metal emergency key.
When you get the ECU back just do everything in reverse, reconnect the battery last and the car will never know anything has been touched. No error codes, nothing.
If you’re going to fit the ECU heat-shield to help prevent the more and more common heat damage that is killing these ECU’s then click here for fitment details.
T7 ECU Removal
9-5 from 1998 to 2010
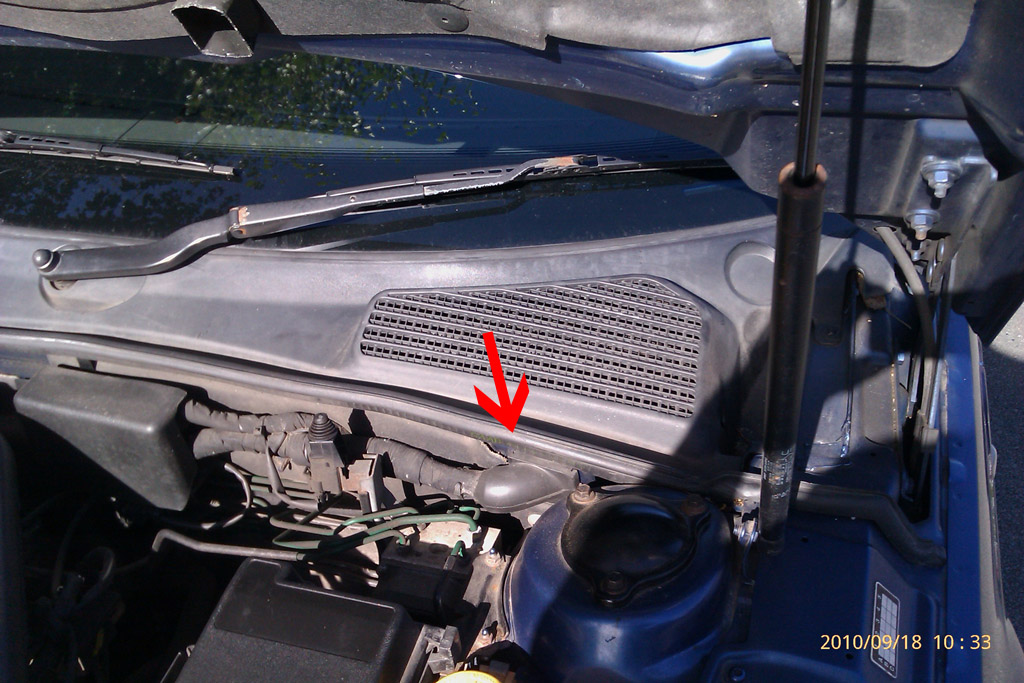
The ECU is located on the passenger side under the plastic scuttle panel (below the windscreen).
Step 1. Get a Saab 9-5.
Step 2. Open bonnet.
Step 3. Pull up the middle few inches of the rubber seal strip. Don’t pull the end of the strip off (on the wing) as the plastic clips are a pig to get back in and they may break.
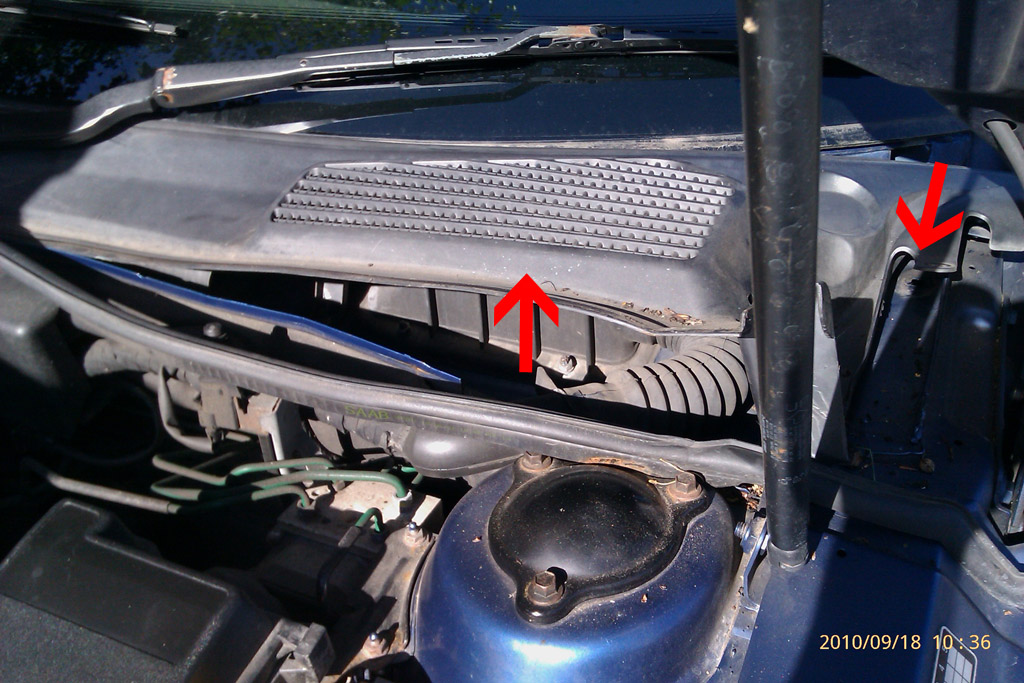
Step 4. Undo the plastic screw next to the bonnet hinge and pull the retaining plug out of the hole.
Step 5. CAREFULLY pull the plastic scuttle plate up just until you can get hold of it enough to slide it forwards away from the windscreen. Don’t pull it upwards too far because the plastic clips that locate it under the edge of the windscreen break very easily (ask me how i know!)
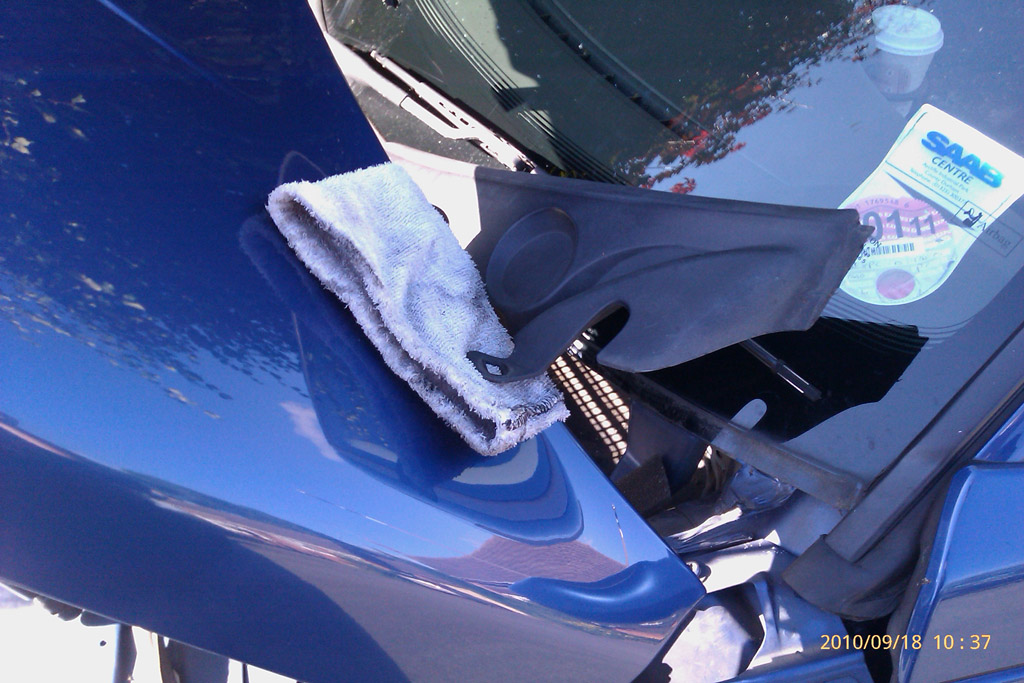
Step 6. Using a cloth to protect the paintwork you can hang the scuttle panel out of your way on the edge of the bonnet.
Step 7. You now have access to the ECU waterproofing boot. It’s held down by four 10mm hex nuts. A squirt of penetrating oil may help free them if they’re rusty.
Step 8. The boot will lift up to reveal the ECU itself. The large connector on top is removed by lifting the middle of the clip.
Step 9. The tricky bit. The ECU itself is held in by two 10mm nuts, one on each side of the ECU about halfway down. You need a long socket or an extension to get at them. If you have the fingers of a concert pianist then you should be able to keep hold of the nuts when they come off. For the rest of us, a blob of blue-tak or reversed sticky tape inside the socket ensures they don’t drop down into the passenger footwell (if you’re lucky) or on top of the glove box and wiring loom (if you’re not).
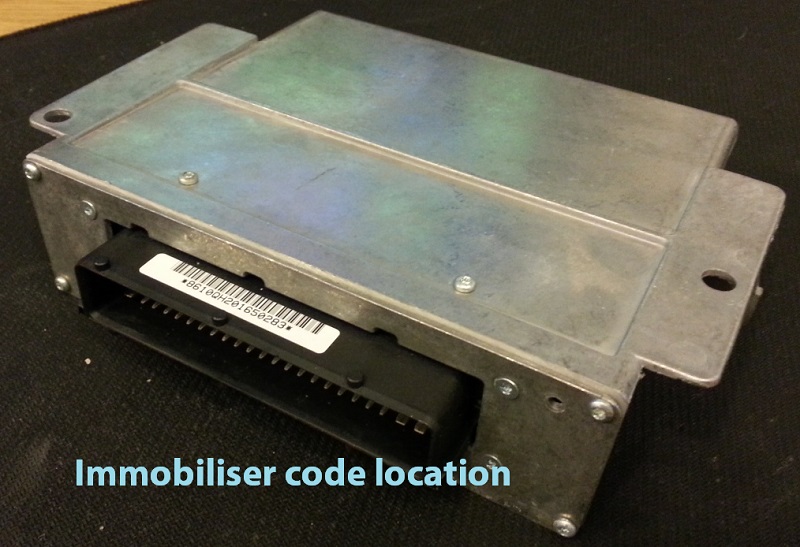
If you need the immobiliser code (for cloning a spare ECU for example), it’s on a long thin sticker on the back of the ECU connector, not on the big stickers on the front of the ECU (even though there is a code that looks like it).
You may be able to take a picture of the code without removing the ECU by using a camera phone on its own or with a mirror.
Replacement is the reversal of removal.

9-3 from 1998 to 2002
(98-00my is T5 but ECU is in the same place)
The ECU on the earlier 9-3 is tucked under the end of the dash behind the carpet next to the driver’s right foot (on RHD). 1 x 10mm bolt holds the carpet at the door pillar, remove that and pull the carpet from around the bonnet release and you’ll see the ECU tucked upside down at the end of the dash. Pull down on the middle of the connector and it will come free. The front edge of the ECU nearest you is held in with either a Torx25 screw or 8mm headed bolt, the back edge is held by a spring clip. Undo the screw/bolt and you can then pull down on the ECU and manipulate it out, you may have to pull the loom out of the way and it can foul on the floor insulation at the back but that’s about it.
To see the immobiliser code you don’t have to take it all the way out, just undo the connector and that exposes the ECU’s connector and the immo code is on the back of it, the side towards the outside of the car. A camera phone or phone and mirror will do the trick.